TableLayout
TheTableLayout groups views into rows and columns. You use the <TableRow> element to designate a row in the table. Each row can contain one or more views. Each view you place within a row forms a cell. The width for each column is determined by the largest width of each cell in that column.Populate
main.xml with the following elements and observe the UI as shown in Figure 7. <?xml version="1.0" encoding="utf-8"?> <TableLayout xmlns:android="http://schemas.android.com/apk/res/android" android:layout_height="fill_parent" android:layout_width="fill_parent" android:background="#000044"> <TableRow> <TextView android:text="User Name:" android:width ="120px" /> <EditText android:id="@+id/txtUserName" android:width="200px" /> </TableRow> <TableRow> <TextView android:text="Password:" /> <EditText android:id="@+id/txtPassword" android:password="true" /> </TableRow> <TableRow> <TextView /> <CheckBox android:id="@+id/chkRememberPassword" android:layout_width="fill_parent" android:layout_height="wrap_content" android:text="Remember Password" /> </TableRow> <TableRow> <Button android:id="@+id/buttonSignIn" android:text="Log In" /> </TableRow> </TableLayout>
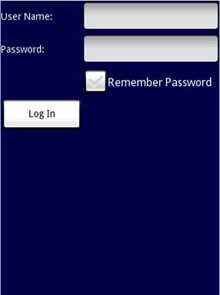
Figure 7 Using the TableLayout
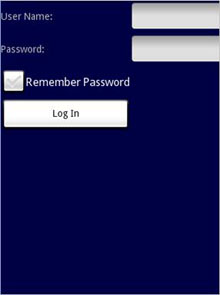
Figure 8 Note the change in the position of the Remember Password view