ListView View
The ListView view displays a list of items in a vertically scrolling list. To see how the ListView view works, add a new file to the res/layout folder and name it as listview.xml and populate it with the following element:<?xml version="1.0" encoding="utf-8"?> <LinearLayout xmlns:android="http://schemas.android.com/apk/res/android" android:orientation="vertical" android:layout_width="fill_parent" android:layout_height="fill_parent" > <ListView android:id="@+id/android:list" android:layout_width="fill_parent" android:layout_height="fill_parent" /> </LinearLayout>
package net.learn2develop.AndroidViews;

import android.os.Bundle;
import android.view.View;
import android.widget.ArrayAdapter;
import android.widget.ListView;
import android.widget.Toast;
import android.app.ListActivity;

public class ListViewExample extends ListActivity
{
    String[] presidents = {
            "Dwight D. Eisenhower",
            "John F. Kennedy",
            "Lyndon B. Johnson",
            "Richard Nixon",
            "Gerald Ford",
            "Jimmy Carter",
            "Ronald Reagan",
            "George H. W. Bush",
            "Bill Clinton",
            "George W. Bush",
            "Barack Obama"
    };

    @Override
    public void onCreate(Bundle savedInstanceState)
    {
        super.onCreate(savedInstanceState);
        setContentView(R.layout.listview);

        setListAdapter(new ArrayAdapter<String>(this,
            android.R.layout.simple_list_item_1, presidents));
    }

    public void onListItemClick(
    ListView parent, View v,
    int position, long id)
    {
        Toast.makeText(this,
            "You have selected " + presidents[position],
            Toast.LENGTH_SHORT).show();
    }
}
Modify the AndroidManifest.xml file to register the new activity:
<?xml version="1.0" encoding="utf-8"?>
<manifest xmlns:android="http://schemas.android.com/apk/res/android"
      package="net.learn2develop.AndroidViews"
      android:versionCode="1"
      android:versionName="1.0.0">
    <application android:icon="@drawable/icon" android:label="@string/app_name">

        <activity android:name=".ViewsActivity"
                  android:label="@string/app_name">
            <intent-filter>
                <action android:name="android.intent.action.MAIN" />
                <category android:name="android.intent.category.LAUNCHER" />
            </intent-filter>
        </activity>

        <activity android:name=".ListViewExample"
                  android:label="@string/app_name" />

    </application>
</manifest>
package net.learn2develop.AndroidViews;

import android.app.Activity;
import android.content.Intent;
import android.os.Bundle;

public class ViewsActivity extends Activity
{
    /** Called when the activity is first created. */
    @Override
    public void onCreate(Bundle savedInstanceState) {
        super.onCreate(savedInstanceState);
        setContentView(R.layout.main);

        startActivity(new Intent( this, ListViewExample.class));

    }
}
F11 to debug the application on the Android emulator. Figure 5 shows the ListView view in action. When an item is selected, a message will be displayed.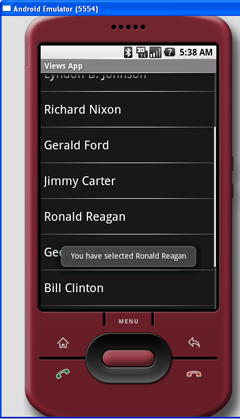
Figure 5: The ListView view in action