Gallery and ImageView Views
The Gallery is a view that shows items (such as images) in a center-locked, horizontal scrolling list. Figure 8 shows the Gallery view used in the Android Market.
Figure 8: The Gallery view used in the Android Market
<?xml version="1.0" encoding="utf-8"?>
<LinearLayout xmlns:android="http://schemas.android.com/apk/res/android"
    android:orientation="vertical"
    android:layout_width="fill_parent"
    android:layout_height="fill_parent"
    >

    <TextView
        android:layout_width="fill_parent"
        android:layout_height="wrap_content"
        android:text="Images of San Francisco" />

    <Gallery
        android:id="@+id/gallery1"
        android:layout_width="fill_parent"
        android:layout_height="wrap_content" />
    <ImageView
        android:id="@+id/image1"
        android:layout_width="320px"
        android:layout_height="250px"
        android:scaleType="fitXY" />

</LinearLayout>
<?xml version="1.0" encoding="utf-8"?>
<resources>
    <declare-styleable name="Gallery1">
        <attr name="android:galleryItemBackground" />
    </declare-styleable>
</resources>
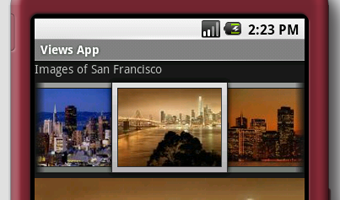
Figure 9: Gallery view, with borders on images
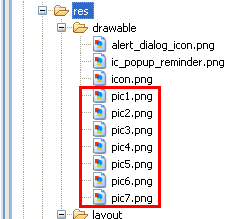
Figure 10: Adding images
package net.learn2develop.AndroidViews;

import android.app.Activity;
import android.content.Context;
import android.content.res.TypedArray;
import android.os.Bundle;
import android.view.View;
import android.view.ViewGroup;
import android.widget.AdapterView;
import android.widget.BaseAdapter;
import android.widget.Gallery;
import android.widget.ImageView;
import android.widget.Toast;
import android.widget.AdapterView.OnItemClickListener;

public class DisplayViewsExample extends Activity
{
    //---the images to display---
    Integer[] imageIDs = {
            R.drawable.pic1,
            R.drawable.pic2,
            R.drawable.pic3,
            R.drawable.pic4,
            R.drawable.pic5,
            R.drawable.pic6,
            R.drawable.pic7
    };

    @Override
    public void onCreate(Bundle savedInstanceState)
    {
        super.onCreate(savedInstanceState);
        setContentView(R.layout.displayview);

        Gallery gallery = (Gallery) findViewById(R.id.gallery1);

        gallery.setAdapter(new ImageAdapter(this));
        gallery.setOnItemClickListener(new OnItemClickListener()
        {
            public void onItemClick(AdapterView parent,
            View v, int position, long id)
            {
                Toast.makeText(getBaseContext(),
                        "pic" + (position + 1) + " selected",
                        Toast.LENGTH_SHORT).show();
            }
        });
    }

    public class ImageAdapter extends BaseAdapter
    {
        private Context context;
        private int itemBackground;

        public ImageAdapter(Context c)
        {
            context = c;
            //---setting the style---
            TypedArray a = obtainStyledAttributes(R.styleable.Gallery1);
            itemBackground = a.getResourceId(
                R.styleable.Gallery1_android_galleryItemBackground, 0);
            a.recycle();
        }

        //---returns the number of images---
        public int getCount() {
            return imageIDs.length;
        }

        //---returns the ID of an item---
        public Object getItem(int position) {
            return position;
        }

        public long getItemId(int position) {
            return position;
        }

        //---returns an ImageView view---
        public View getView(int position, View convertView, ViewGroup parent) {
            ImageView imageView = new ImageView(context);
            imageView.setImageResource(imageIDs[position]);
            imageView.setScaleType(ImageView.ScaleType.FIT_XY);
            imageView.setLayoutParams(new Gallery.LayoutParams(150, 120));
            imageView.setBackgroundResource(itemBackground);
            return imageView;
        }
    }
}
When an image in the Gallery view is selected (or clicked), the position of the image selected is displayed.
Modify the AndroidManifest.xml file to register the new activity:
<?xml version="1.0" encoding="utf-8"?>
<manifest xmlns:android="http://schemas.android.com/apk/res/android"
      package="net.learn2develop.AndroidViews"
      android:versionCode="1"
      android:versionName="1.0.0">
    <application android:icon="@drawable/icon" android:label="@string/app_name">
        <activity android:name=".ViewsActivity"
                  android:label="@string/app_name">
            <intent-filter>
                <action android:name="android.intent.action.MAIN" />
                <category android:name="android.intent.category.LAUNCHER" />
            </intent-filter>
        </activity>

        <activity android:name=".DisplayViewsExample"
                  android:label="@string/app_name" />

    </application>
</manifest>
public class ViewsActivity extends Activity
{
    /** Called when the activity is first created. */
    @Override
    public void onCreate(Bundle savedInstanceState) {
        super.onCreate(savedInstanceState);
        setContentView(R.layout.main);

        startActivity(new Intent(this, DisplayViewsExample.class));

    }
}
F11 to debug the application on the Android emulator. Figure 11 shows the Gallery view in action. You can scroll through the list of thumbnail images by swiping it. When an image is selected, the name of the image selected will be displayed by the Toast class.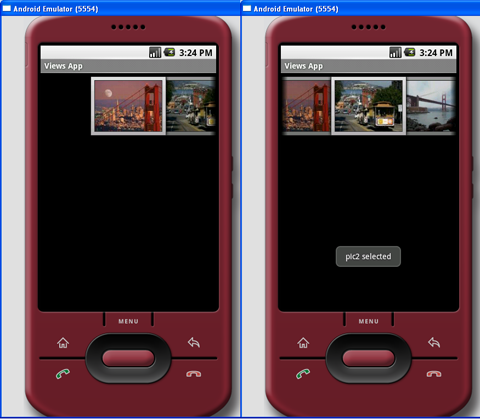
Figure 11: The Gallery view in action
public void onItemClick(AdapterView parent,
            View v, int position, long id)
            {
                //---display the images selected---
                ImageView imageView = (ImageView) findViewById(R.id.image1);
                imageView.setImageResource(imageIDs[position]);
            }
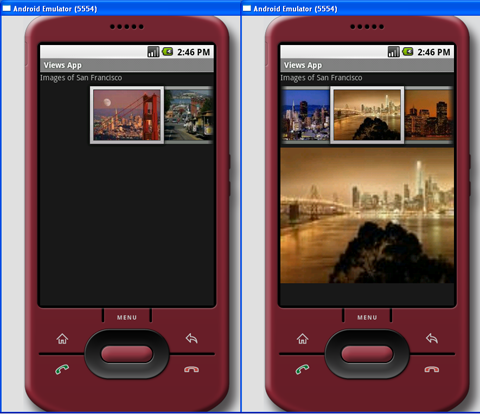
Figure 12: Selected image displayed in ImageView view